As Valentine's Day approaches, I've been inspired to turn my daily "zentangling" to hearts. There are endless ways to decorate that intrinsic shape and here are just a few of my spontaneous tries. Not a lot of time spent on any of them. One is nearly a copy of one of Maria's heart tangles out there on the web. It's such a great design with the wrappings around Mooka's. I love it!
I am teaching a Botangle class on hearts next weekend. Unfortunately it is in competition with the Super Bowl. The hot link "Botangle class" takes you to the site for sign up and details.
Followers
Sunday, January 31, 2016
Saturday, January 23, 2016
Festive Studio/Classroom
Now that the holidays are over, I still try to remain festive in the bleak midwinter. This faux aspen tree that I had used to display Christmas ornaments has found a permanent home in the corner of my Botangle studio/classroom. To refresh your memory or if you haven't seen my previous blogs, I painted a "Tangle Teaching Tree" mural on my studio walls. Dangling birds fit in perfectly with the theme. I love the magical quality of the fairy lights on this aspen, and since I live in Estes Park, Colorado, this couldn't be more fitting as decoration to display zentangled projects that I offer as classes. Ornaments, birds, and soon bejeweled, tangled Bijou tiles will adorn my enchanted tree.
You can order this tree and other in varying sizes from Restoration Hardware. I got mine on sale and was very pleased with the quality and easy set up. I hope this inspires you to keep the festive spirit in your hearts, homes, and work as the new year sheds its days.
Thursday, December 31, 2015
Cheers to 2016!
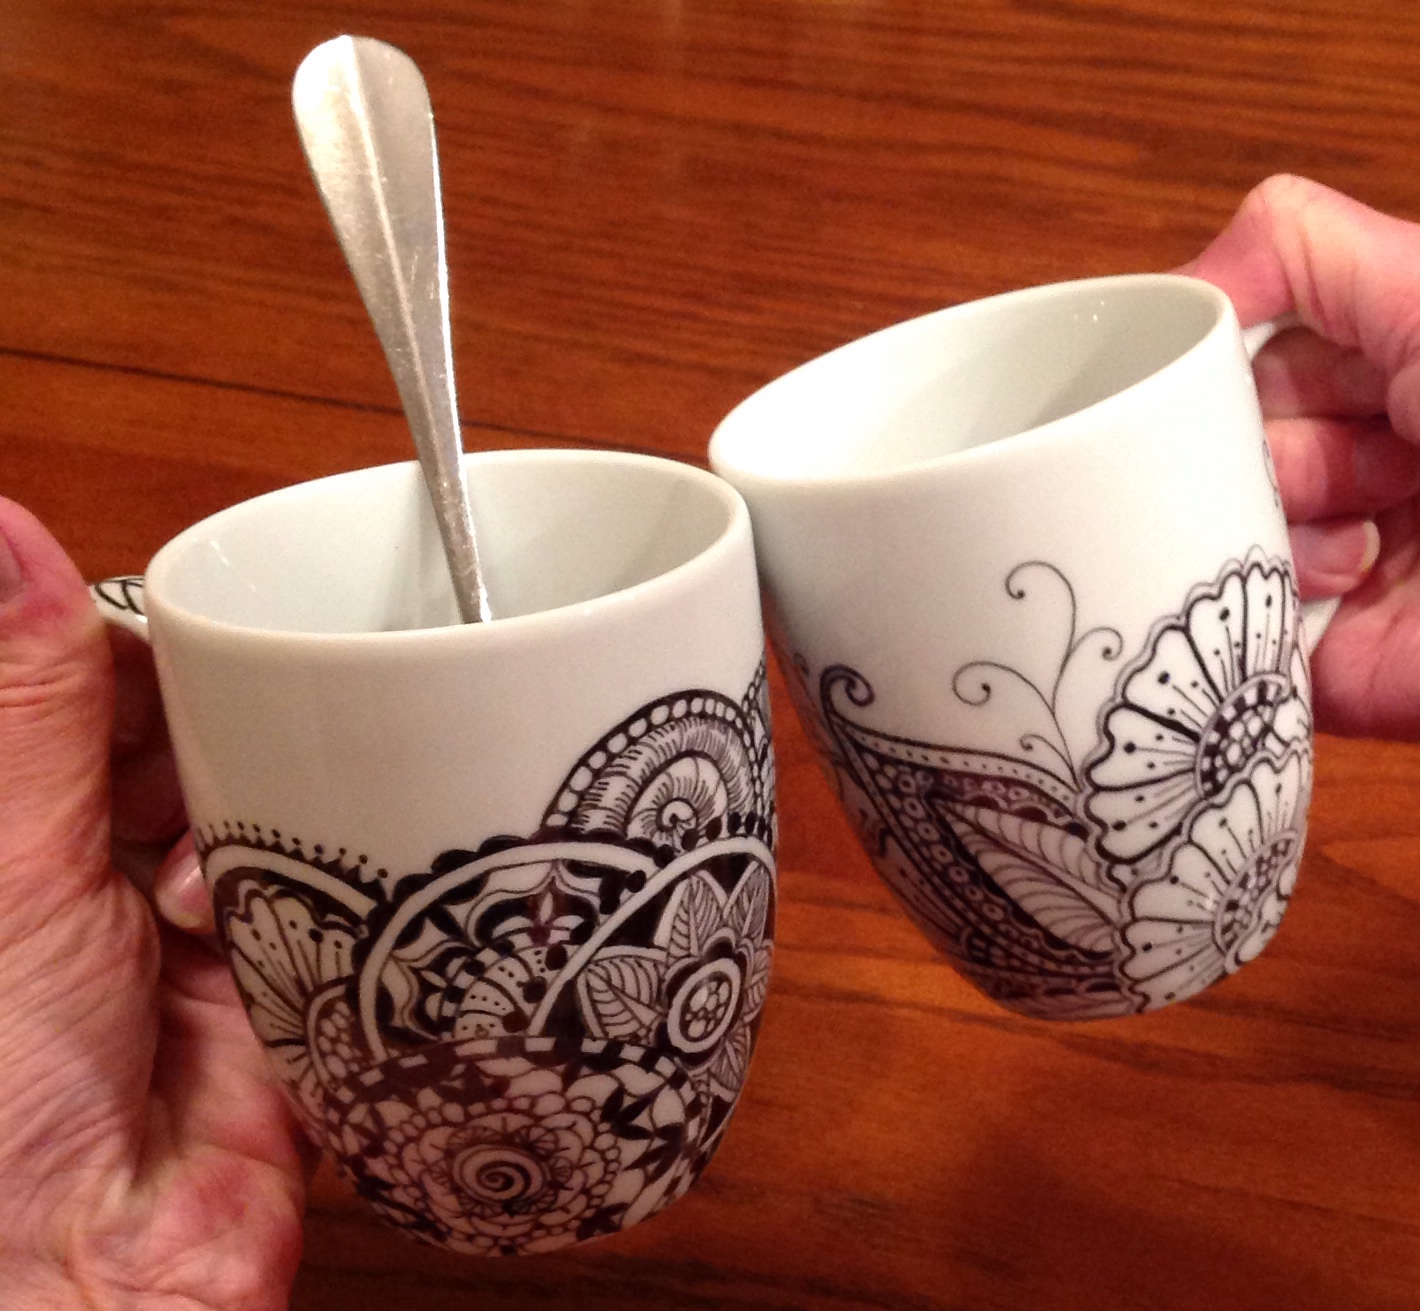
Ringing in the new year with an evening of tangling these cups. But the best part was filling them with the delightful drink to toast with. It's hot chocolate laced with amaretto and topped with whipped cream (not from the can!)
May your bellies too be warm and full and the year 2016 hold lots of great surprises and creative inspiration for you!
Sunday, December 20, 2015
Bah Humbug! - NOT
"Oooh-whee!" exclaimed my German husband as he opened the door to my classroom/studio to bring me my afternoon Jasmine tea and gingerbread. You've got a Santa's workshop down here." "Looks more like last night's 70-mph winds whipped through my room, I replied." I was having so much fun creating, with Pandora music blasting from the other room and Bellina at my feet (no, ON my feet) that I hadn't noticed the time or the mess. It was good to sit back and reflect.
Just after Thanksgiving, I went into kind of a funk. I had decided to say Bah Humbug! to Christmas. But last week thoughtful small gifts from my friends at work prompted me to rally and reciprocate with my own little gifts; my usual custom. To combat my otherwise sad feelings, I decided to make some whimsical notecards. My friends are often the recipients of my botanical illustrations in card form. But I wanted these to be more fresh, more fun! I didn't have much time so I used some of my "Tangling with Stamps" images that I had prepared for last weekend's class. And as if I don't have enough art hobbies, I started carving my own stamps and used some in this series of cards. Coupling the whimsical images with fun phrases like, "A hug in a cup," "Head over heels for you," and Apple of my eye," made for some cheerful greeting cards that I thought my friends could use for Valentines. Not works of art, but I hope these will bring a smile to someone's face. The whole process cheered me up, and I'm back in the Christmas spirit!
![]() |
| A hug in a cup |
![]() |
| Apple of my eye |
| Also apple of my eye! |
Saturday, November 28, 2015
Tis the Season
Well it's official. If you let yourself get caught up in the bustle of the holidays, it began yesterday. With family members slowly trickling back to their homes after feasting and fun, my frosted mountain home is nearly empty again. Today's falling snow-globe snow put me in a creative mood, and the quiet allows me to reflect on the time spent with my loved ones; rather rambunctious. But the settling peace compels me to tell you about a craft project I finished months ago; one that could be a nice gift for you to bestow on your friends and family. If you've read my Tangle Teaching Tree posts, you'll know I like to tangle birds. I wanted to see what one would look like in 3-D. So I began creating paper mache birds to hang and set around my studio and tree mural I painted for my Botangle Studio.
With minimal tools, you too can make this paper finery. I was inspired by Mollie Greene's Sweet Paper Crafts. Instructions on how to make the "Percher Bird" are clearly laid out with wonderful illustrations in her book.
After completing the frame, I painted my cheerful swallow a plain white and used my trusty two-pointed Identipen to tangle on the patterns. Here is just one bird shown in different angles so you can see what fun it is to use the body planes created in the construction as your established string. So many Zentangle patterns work perfectly for feathers, tails, wings, head, and breast. Have fun experimenting with your ideas! And just imagine how fun it would be to make some colorful ones as well. My two dictionary birds shown last are waiting to be embellished.
With minimal tools, you too can make this paper finery. I was inspired by Mollie Greene's Sweet Paper Crafts. Instructions on how to make the "Percher Bird" are clearly laid out with wonderful illustrations in her book.
After completing the frame, I painted my cheerful swallow a plain white and used my trusty two-pointed Identipen to tangle on the patterns. Here is just one bird shown in different angles so you can see what fun it is to use the body planes created in the construction as your established string. So many Zentangle patterns work perfectly for feathers, tails, wings, head, and breast. Have fun experimenting with your ideas! And just imagine how fun it would be to make some colorful ones as well. My two dictionary birds shown last are waiting to be embellished.
![]() |
| This percher hanging out in my teaching studio. |
![]() |
| Breast view |
![]() |
| Under belly and wings |
![]() |
| My "Word Birds" waiting for another layer of embellishment, or not . . . |
| Sunrise over our neighborhood. |
Wednesday, November 11, 2015
Tangling with Stamps
I love the versatility of Zentangle patterns; like combining them with rubber stamps. Getting ready for my upcoming class at Two Hands Paperie in Boulder called Tangling with Stamps, I use various rubber stamps as contours or "strings" to fill with patterns. Completing the vignettes with shading, color work ( either colored pencil or watercolor) and gel pens is so much fun. There are no creative boundaries!
Here you see some fall-themed ideas, but the holidays are upon us and using stamps themed for them could yield beautiful Christmas and Hanukkah cards. This class will certainly help you unwind and de-stress before the holiday season rush and help you get a head start on card and gift ideas. You can also fall back on the Zentangle method of drawing any time you need to catch your breath. I will provide everything needed to create a miniature stamped art piece for class, but you are welcome to bring your favorite rubber stamps to work with. As you will see in my samples, the stamps need to have generous open spaces to be able to fill in with tangle patterns.
![]() |
| "Time, time, time, see what's become of me. . ." |
![]() |
| "As I look around, for my possibilities . . ." |
![]() |
| "I was so hard to please . . ." |
| "So look around, leaves are brown, and the sky is a hazy shade of winter." |
| "Look around, leaves are brown, there's a patch of snow on the ground. " Do you remember these lyrics from Simon and Garfunkel's song? |
| Apple composition waiting to be tangled. |
Monday, November 2, 2015
Masks and More
Had a fun Halloween this year with my own "tangled" mask. Here are pics of "how to" and the mask in action. I started with an inexpensive paper mache mask from the kid's section of Guiry's art store in Boulder. I simply painted the mask with a base coat of acrylic paint. Then I got out my black Identi pen and went for it! I used some of my favorite tangles; Mooka, Nzeppel, Betweed, Perfs, Auras, a touch of Beetlejuice and Crescent Moon, and the ribbon one that I call "Hills and Valleys." Not sure what the official name is and or who created it. Sorry. Most of the other tangles are from Rick and Maria.
After the fun of tangling and watching my mask take on a life of its own, I shaded with carbon dust and sprayed it with a matte varnish. The final touch; adding glass beads (with a glue gun, of course) and ribbons for fastening.
I can't wait to make more. Want to have some ready for Mardi Gras!
After the fun of tangling and watching my mask take on a life of its own, I shaded with carbon dust and sprayed it with a matte varnish. The final touch; adding glass beads (with a glue gun, of course) and ribbons for fastening.
I can't wait to make more. Want to have some ready for Mardi Gras!
| Could be Carnival in Venice! |
![]() |
| This was a pretty poor quality photo to begin with so I "Photoshopped" it for a better look. |
Subscribe to:
Posts (Atom)